banner
Get off the cross we need the wood

About Me

Maybe-not-really-20-something-anymore from Norway who likes to scrapbook and take photos documentarystyle and dreams of photojournalism when not working as a photojournalist and that's pretty much what this blog is about. And I like it this way.


My Scrapbooking

Been scrapbooking since late fall 2005. Currently fortunate enough to be a part of the design teams for Hambly Screenprints, Fancy Pants Designs and Pencil-Lines. ♥


2/2

~~ PiH’s skissekortkonkurranse :) ~~

Posted by Ania On Wednesday, March 31, 2010 3 lovely comments

Papir i Hjertet, a scrapstore in Norway, turns three years old (how quick time flies!) and has a sketch-contest going on. Loved both the layout- & cardsketch, made by HegeAL – had to join! :) Here’s my cards – hopefully I’ll get a layout done sometime this Easter aswell :) Happy Birthday PiH! :)

card1aa

The rules, besides using the sketch, was to use at least one paper that’s more than a year old, and to reuse/recycle something non-scrappy. I lovelovelove the woodgrain-papers from Hambly, and despite having a number of both the papers & transparencies I’m so cheap when it comes to using it – I don’t want to be out of it just in case! Well, with this challenge from PiH I decided it was about time to use *some* of it hm? I have no idea how long I’ve saved this scrap-transparency in my scrap-folder – but it’s surely more than a year! :P (It’s one of the original designs from Hambly back when they started doin scrapstuff afaik – at least one of the designs helping Hambly break in to the scrappy market)

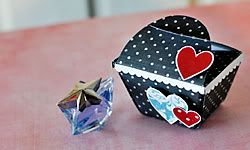
My non-scrappy item is the yellow little clips thingie (decorated w/red bling). We did a huge spring-cleaning at work a few weeks ago, and among the things that was found in the old darkroom was a box of this. It looks pretty old, and noone knew what it was for. Here’s some piccies of the box:

stjerneryttere1 stjerneryttere2 It’s called “Stjerneryttere” (translated: starriders), but I couldn’t find anything when googling it. Could it have been something that was used for darkroom-photography, or is it just a random office-thingie? (couldn’t have been much useful as it’s not very good at holding heavier stuff together sort of). Nevertheless, I was asked if I wanted it since they thought it might have something to do w/photography, and I said sure, thinking of scrapping ;) It’s small and cute :)

Anyone out there knows what it is for?

Edit: Lizzie thought it must be something to hang up the negatives with. Ofcourse - why didn't Ithink of the lightness of negatives when thinking they were too small to hold anything of weight - these clips must surely be enough to hold the negs. Sounds very plausible!

card1

Anyways, back to the card. I love to use transparencies like this for cards. Looks so elegant dontchathink :) The transparency-butterflies got blinged up, and I have to say I am more and more in love with the Hambly-kraft-stickers! :)card1a NEW Hambly! Cute hearts-paper! :) I colored one of the hearts w/magenta stickles.

card2

I loved the sketch so much I even made another card, but I don’t really like it as much as the first one. Nevertheless – I tried, that’s an extra chance for the contest, no? =)

Scenic Route paper (loves!) – it’s more than a year old (and SR is no more :( ), embellished w/Hambly rub-ons and another Hambly Kraft-sticker, aswell as cute felt-butterflies I got from Eli long time ago (Christmas –08 wasn’t? :) ). My non-scrappy item here is the borders made from filmrolls – I cut out the borders.

Mkay, off to do some grocery-shopping for Easter then hopefully back to start on the other PiH-sketch :)

In the meantime – have a lovely Easter :)

Ps! Kjære mamma. Ja, jeg har laget kort til mormor og det sendes idag. Jeg er treg, jeg vet det. Sorry! Den som venter på noe godt etc etc....god påske! =)


3 lovely comments

~~ and don’t ever put me down ~~

Posted by Ania On Tuesday, March 30, 2010 3 lovely comments

I thought spring had sprung. Like, finally. Only, it started snowing again last night and this morning the roads were all iced down and stuff. Bleh. No snow today, and yesterdays snow has disappeared, but the fact that it actually occurred sort of sets you back a notch. Double-bleh.

I´ve started planting a bunch of herbs and vegetables though. The green little spires makes me happy. I´m not one for flowers and stuff, they just die all the time so it´s wasted money buying me flowers. But useful stuff like herbs and stuff - yeah - I´m a little more rigid about watering and caring. Unless it´s stupid cucumbers. They need so darn much water that once you forget about them just one day they shrink and stuff - no fun! But I digress....figured I´d share the little hostess-gift I made the other day, and which you can see over at the Fancy Pants blog for my "Fancy this" post.

basil_pot2

I think seedlings makes cute hostess-gifts. Feels a bit more thoughtful and useful. If the receiver is into herbs I guess. Nevertheless it´s different isn´t?

tutorial_pot

I started out with an empty jar.

tutorial_pot3

Which was gessoed (I wasn´t sure if watching soil & roots through a glass jar would be any nice).

tutorial_pot4

And decorated with a transparency - an elegant, flocked one from "Road Show", one of the new collections from CHA-W.

basil_pot

Then, after placing the soil&spires in the jar, I just added a tag to it. One decorated with lots of glimmer-mist, a Tattered Angels chip tile (which was painted, misted & glossy accented), ribbon and a rub-on from "Road Show". I even sewed a mini-banner on the tag. Heh. The seedlings are Basil by the way. My fave-herb for cooking :)

card2

I also made a couple cards for the recent product-spotlight over at the Fancy Pants blog - using rub-ons from "My Family".

card1

Simple cards. Quick & easy to make.

Wish you all a joyous Easter. Am still at work, and might work some this Easter, but looking forward to the time off I´ll get too.


Title: Lift me – Ane Brun & Madrugada


3 lovely comments

~~ did I say that I need you? ~~

Posted by Ania On Tuesday, March 23, 2010 6 lovely comments

Woah. The last few weeks has been a bit of a whirlwind blogwise with all these tutorials (thanks for the awesome response to these by the way :) ). Time to sit down and just breathe and start looking forward.

But first – I guess I need to share the things that didn’t get shared while the tutorials were taking place.


summertime This was created for the productspotlight on Rusted Sun glitter cuts. It’s a quite simple layout – usually I’m not too fond of patterned papers that sort of dictates how the page will look like, but it worked splendidly here. I sprayed Jazz Blue, Graphite and Gold glimmer mist all over the page before adding my photos, glitter cut (up top), rub-ons (on the side to the right) and a label from the new Tags and titles tag-book – all from the Rusted Sun collection from Fancy Pants Designs. Oh, and a miniheart from the Element Sticker-sheet. Random photos from the summerplace. Oh, how I long for sun & summer!

vinteren2010_w

Another layout for Fancy Pants Designs, with the wonderful winter collection “Frosted”. Love this collection so much – the colors, the patterns…ah…swoon :) Also added some Glimmer Glass from Tattered Angels - “Frosted Memories” – sprayed with some more Jazz Blue glimmer-mist. Did I mention that March = blog-relay with Tattered Angels? That’s why most of my Fancy Pants stuff this month utilizes their products too. Although – I didn’t need much encouragement using their stuff, especially the glimmer-mist. Love to use it pretty much all the time – just a bit more subtly. Oh, and the theme of this layout is – if you’ve guessed it – how this winter has affected our bathroom-floor :p

vinteren2010

No room for journaling = add hidden journaling! This time a Frosted-sticker was adhered to a piece of cardstock & tucked behind the designated area (notice how I didn’t sew in the pocket so that I could slide my journaling in & out). Marked it with small buttons too. I’m soooo clever (ha ha ha).


sketch I hosted the Sunday Sketch over at the Pink Paislee last Sunday – featuring Skissedilla (Happy Birthday Skissedilla!) & a sketch by HegeAL (see below).

See that piccie? That’s me. In high heels. ♥ And the reflection of me and Amalie (taken against the glass-windows at Grieghallen. No, Amalie is not at a leash. She’s just pulling my jacket-belt. That lil bugger :p)

#31 Isn’t such a lovely sketch? :) As mentioned, Skissedilla is now one year old – congrats on the feat, Skissedilla! :)

sketch_cu1

I used Bayberry Cottage along with paint. Yum! Love. Paint! :) sketch_cu2 Used a lot of stuff from the collection – cork buttons, rub-ons, clear borders ..

ania179 Finally – last Pencil-Lines sketch - #179 guested by Tara Orr who also provided the sketch. White cardstock, glimmer-mist (yeah yeah – Jazz Blue and Pink Bubblegum this time – I promise – I do have a lot of other colors too, I just lovelovelove Jazz Blue/Patina!) and lots of Hambly yumminess, along with a tucked piece of a Making Memories noteworthy-thingie.


Mkay. That’s what I had to share for now. Now – dinner, cuddling sick girl (who’s much better now though) and trying to update my photography-portfolio. Last weekends workshop on external flash was great and enlightening – and expensive – I’m now impatiently waiting for reflectors & softboxes from ebay and pondering how to get enough money for a second external flash & more important, PocketWizards. Sigh. (How come on all the workshops I’ve been at until now they’re always making a point about me being a press-photographer when commenting my style/photos. I think that’s a good thing. I know I am a nice one, not as intrusive as I’ve seen some behave! It’s fun though, as long as I believe they’re saying that as a good thing. I hope.)


Title: “Just Breathe” – Pearl Jam


6 lovely comments

~~ Bloghop: notebook-tutorial ~~

Posted by Ania On Sunday, March 21, 2010 26 lovely comments

Hi, and welcome to the bloghop courtesy of Rebekah :) I couldn't possibly say no for another chance to share a tutorial when she asked, so here you go :)

I’m gonna share a quick & easy tutorial using plain papers (notebook-papers is fine), a pretty transparency (I used Hambly here), ribbon and a sewing machine.

notebook3

Just take a few sheets (I used 5) of plain A4 or lettersize papers, or a few sheets from your notebook, whatever.

notebook4

Split them in two (which should make the papers A5-sized I think, not sure what it'd be called for you Americans though) notebook5

Fold using a bonefolder... notebook6

Stack like three or five or even more - depending on how big you want your notebook to be - together.

notebook7

Measure your transparency - remember to make room for the "back" (what's the technical term here, anyone? Spine? Hm. I think so.) by measuringt he transparency against the paperstack. Cut the measured transparency (you can also just save the cutting-part of the transparency until youre done sewing in your papers & sure where the edges will be sort of. Me? I just wing stuff :P)

notebook8

I folded the transparency prior to sewing the papers on. Not really needed. notebook9

Sew the stacks on one by one (stack). Hard to explain in words but I hope you understand what I mean re where to sew them on. Just ask if not sure. Or wing it, as I would have done if it was me :P notebook10

All the stacks are sewed on. notebook11

Grab a ribbon & a pen (here: ribbon from Prima), measure. You want enough for a loop for your pen (which you'll just sew on the ribbon) and enough ribbon to be able to tie it around the book. I like the look when I can tie one end around the book before tying it sort of, so the back ribbon is longer than the front one.

Oh, and LOOK, ÜBERCUTE CUPCAKE-TRANSPARENCY FROM HAMBLY!! :)notebook12

Fabri-Tac glue! Or any other very strong glue - glue the pen-end to the spine.

notebook13

Hold it there for a bit until it's really adhered.

notebook14

Reinforce the ribbons by sewing a part of it to the transparency. I used zig-zag-seams here. notebook15

Both front and back needs to be sewn on the transparency. Unless you wanna trust the adhesive only. I didn't wanna, but feel free to be brave & different :p

notebook16

Found a kraft sticker & another of the new Hambly rub-ons (on a square of transparency) as added embellishments for the front. When I figure out who this will be for, I'll add his or her (prob a "her") name to this square w/small letter-stickers methinks. notebook17

Tadah! :)


The next person to visit on the bloghop is Shimelle, and I heard Rebekah has give-aways and stuff throughout the bloghop so feel free to check it out! :) Thanks Rebekah for wanting me to be a part of your celebration & congrats w/your birthday! :)

Ps. Am still in Oslo, attending my 2nd day of a photography workshop. Note to self: when attending a workshop that is about using external flash and intending to drag both your own camera, flash + the workcamera + 2 workflashes, please please please remember to at least BRING ALONG THE CORDLESS FLASH-TRIGGER WITH YOU! It might help to start packing earlier than at 2am after getting home from a get-together when having to get up again at 5.30am to catch the plane. Just sayin'.
Luckily I did bring along the cordless trigger for the work-camera, and as all the attendees but one other is using Canon we're focusing on it, so no real need for me to use my Nikon. Still..would have been nice to be able to practise some on my own camera too..now it's just wasted weight in my backpack, grrr!

26 lovely comments

Random.org and your local calculator is your best friend when trying to pick a winner from over multiple posts! :)

First – I’d like to say a huge thank you for making the last week, and thus the celebration of my 5th bloganniversary fun! :) It’s also been exhausting – I suck at planning and this was really a spur of the moment-idea with little time for the actual preparation (you know when you think you have so much time and then it turns out you don’t? ♥ procrastination ♥ ).

Anyways.

The winner of all this:

pencillines

primagiveaway FPgiveaway hamblygiveaway

is (all the comments of all the giveawayposts @8pm added together):

random who is (w/starting the count from the first/oldest post):

winner

Congrats! :)

Please get in touch with me (as I’m not able to get in touch with you otherwise it seems) within a week (by next Thursday). My contact-info can be found at the sidebar to the right – just email me your name+address. If I have not heard from you by then I’m going to pick a new winner (I am leaving the comments open, but have saved a note with # of the comments as by today at 8pm in case I need to do a new drawing).

Tudelidu & hope you’ll continue drop by :)

Oh.

And happy bloganniversary, Little corner of Ania ;)


8 lovely comments
| | edit post

~~ 5th bloganniversary tutorial: Minicanvas ~~

Posted by Ania On Wednesday, March 17, 2010 50 lovely comments
Edit: the giveaway has now been closed & winner picked. Comments still open though, in case of question and stuff :)

I love creating stuff on mini-canvasses. I’ve stored quite a few of these cute small ones which measures like 4x4” (approx 10cm) and is almost an inch thick (purchased at Søstrene Grene for like 10NOK each :p). While I’ve added photos on canvasses before, my fave thing about these canvasses is actually just to play with paint and ink or mist and leftover bits and pieces lying on my table, particulary rub-ons and stickers. Oh, and to add parts of lyrics and stuff. And I like the small ones because I think it’s usually much easier to actually get it to turn out cute/nice than figuring what more to add to the larger ones (guess it’s a personal preference, though).

love1 You’ll start with a plain canvas. These are already prepared, so no need to add gesso to the surface unless you really want to. I opted not to.

love2Starting with glimmer-mist I added splotches of Gold and Jazz Blue, using both the spray and unscrewing the spray, taking it out to tap on the straw right above the canvas to get larger splotches.

love3 I decided to decorate the edges with ribbons. Pleated ones, that is. I measured the ribbon (from Fancy Pants – “About a Girl”) around the canvas, pleating as I went, to make sure I had enough ribbon. Then, with the help of the sewing machine (and the zig-zag-pattern), the ribbon got pleated for real.

love4 Homemade pleated ribbon! Pwetty!

love6Grabbed a sheet of rub-ons (also from Fancy Pants “About a Girl”), cut out the motif and made sure it actually fit within the canvas. The ribbon is just loosely added around the canvas just to see how the whole canvas will look colorwise.

love7 After rubbing on the rub-on I thought it was time to seal the surface, this time with the matte Multi-Medium from Claudine Hellmuth Studio. Apply the medium with quick, light strokes, as the glimmer-mist will sort of melt and become pretty watercolor-like (using a spray-sealer will help the glimmer-mist to keep its look more I think. I haven’t really sealed canvases with glimmer-mist before, and tbh they still look fine now, 1 1/2+ years later. Just don´t expose unsealed glimmer-mist to direct sunlight. Hm. Not sure you can expose sealed glimmer-mist to sunlight either, tho :p). I liked the look I got here anyways :)

love8 Feeling the canvas still looked somewhat naked, I rummaged through the Fancy Pants felt-stash and was lucky enough to find these bits and pieces which fit the canvas perfectly. These were adhered to the canvas using Fabri-Tac glue – my fave liquid glue atm :)

love9I decided the canvas looked pretty much stuffed & finished already with the added felt, so I thought it was about time to adhere the ribbon to the canvas. Again, Fabri-Tac was used.

love10 Just adhere it one side at a time :)

love Here’s the finished result. Figured I could add these Prima-gemstones to the scallops and the supercute Prima-pebble to the middle of the felty “love” sentiment.

A bit overly cutesy and not really the look I usually end up with when making minicanvasses (see below for my fave prev. canvasses), but it’ll probably make a cute gift to a little girl or something like that (Amalie thinks it's for her. I dunno yet. She's oogling it for sure, fishing for who it's for. I'm a mean mommy :p).

Here’s some older canvasses I’ve made & love, just to show the differences and possibilities you can have with these small cute ones:

comfortable Glimmermist, transparency, rubons and bits from lyrics..

ania_canvas

Painted edges, whitewashed patterned paper, chipboard, buttons and brads..

Glimmermist, paint, rubons (even on the sides) and stickers. And a quote. dino4

Playing with glimmermist, chipboard, glossy accent and pen.

dino3

Same with this minicanvas. Love how the shine of glimmermist really is highlighted by the glossy accent.

Hope you now feel inspired to work on a mini-canvas next time you feel like making something different :)

giveaway
Here’s what you can win tomorrow :)

So as usual, just comment on this post for a chance on the giveaway. This time I’d like to know what you like to recommend listening to, as I’m on the lookout for new music :) And if you actually have a link to a playlist on spotify I’d love to check it out! :)

I’ll do the drawing tomorrow (March 18th) evening at around 8pm my time – the comments on all the prev. posts will be open until then :) Good luck!!


50 lovely comments
    -Get off the cross we need the wood-