


Well, this time I was in a real pinch, and had grown slightly bored of the usual CD-cards I create, so I decided to make CD-envelopes. You can search around the net and find lots of nice templates and such, but me? I’m impatient, and I’m also a “go-with-the-flow”-kinda scrapper, so I just placed the CD upon a 12x12 sheet of paper and started folding.

Place the CD in the middleish of the paper, and fold the sides around – make sure to get even folds (you may want to just place a square – maybe the CD-case – and fold around it instead).

When you have folded all around the CD, you’ll see traces of the folds creating a square.

Grab a pair of scissors and cut slightly slanted towards the corners of the square – see picture.

This is how you want to adhere the bottom flaps – and it really doesn’t matter wheter you adhere the sideflaps over the bottom one, or the bottom one over the sideflaps…I think. :p Anyways. Adhere one flap, then see next step..

For the closure, I used two brads – one on one of the side-flaps, and one on the upper one. Fasten the brad before you adhere the last sideflap :p If you wanna be real fancy though, grab two large buttons and start sewing

Then adhere the last sideflap. If you want to play with the last flap – whip out an edge-puncher.

(it might be prettier having the brads on flaps that’s opposide of each others, like, bottom/top flaps, I dunno why I used the side ones here though )
Fasten a piece of floss/thread around the bottom brad. The closure will be done by swirling the thread around both brads in an “8” circle.

For the front of the envelope, we’ll need to decorate it some – just find bits and pieces you can layer – personally I prefer to create a squareish layer & then add the recipients’ name.

Here’s another CD-envelope

I do this with some of the smaller cards as well – create an unique envelope for them – it works swell with 4x6 cards – but doesn’t quite work for the 6x6 ones because the flaps needs to overlap (or well, you could use two sheets of paper then, I guess – I’ve only tried it briefly once).
I’m well aware there’s templates out there – but shrug – it’s easy to just wing it
All the stuff used here are mostly Crate Paper, by the way
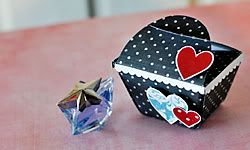
Speaking of Crate Paper? Check this out:
On a side note, we have a special holiday event planned for you next week and as part of this celebratory, daily gift-giving event, we're lining up a day or two to share your holiday Crate Paper Creations!!! Of those that make it on the blog next week, we'll automatically include them in a very special drawing for a mega grand prize!! The big winner will be announced at the end of the event (Friday, December 17th) and so will the prize! So, what are you waiting for?! Email us your holiday creation'(s) at info@cratepaper.com - thanks ahead of time to all whom participate! Further details to come....
Sounds like something for you..?


Så stilig!! Supert at du deler med oss, takk :)) Må prøves!
Strilig!!!
you seriously girl .. ARE TALENTED you hear me .. I love this .. I am going to try this and full credit of course you know I don't play that ha ha ..
I love the envelope you made. It's beautiful.